Invoice PDF & page setup
Choose what's printed on your invoices, name the PDF file, set the footer message, and pick the paper size and margins in Invoicepak Settings.
The Invoice PDF section of Settings controls what's printed on your invoices, what the PDF file is called, the message at the bottom of each page, and the paper size and margins.
The Invoice PDF section at a glance
- In the Shopify admin sidebar, under Invoicepak, click Settings.
- Scroll down to Invoice PDF. It's below Business details.
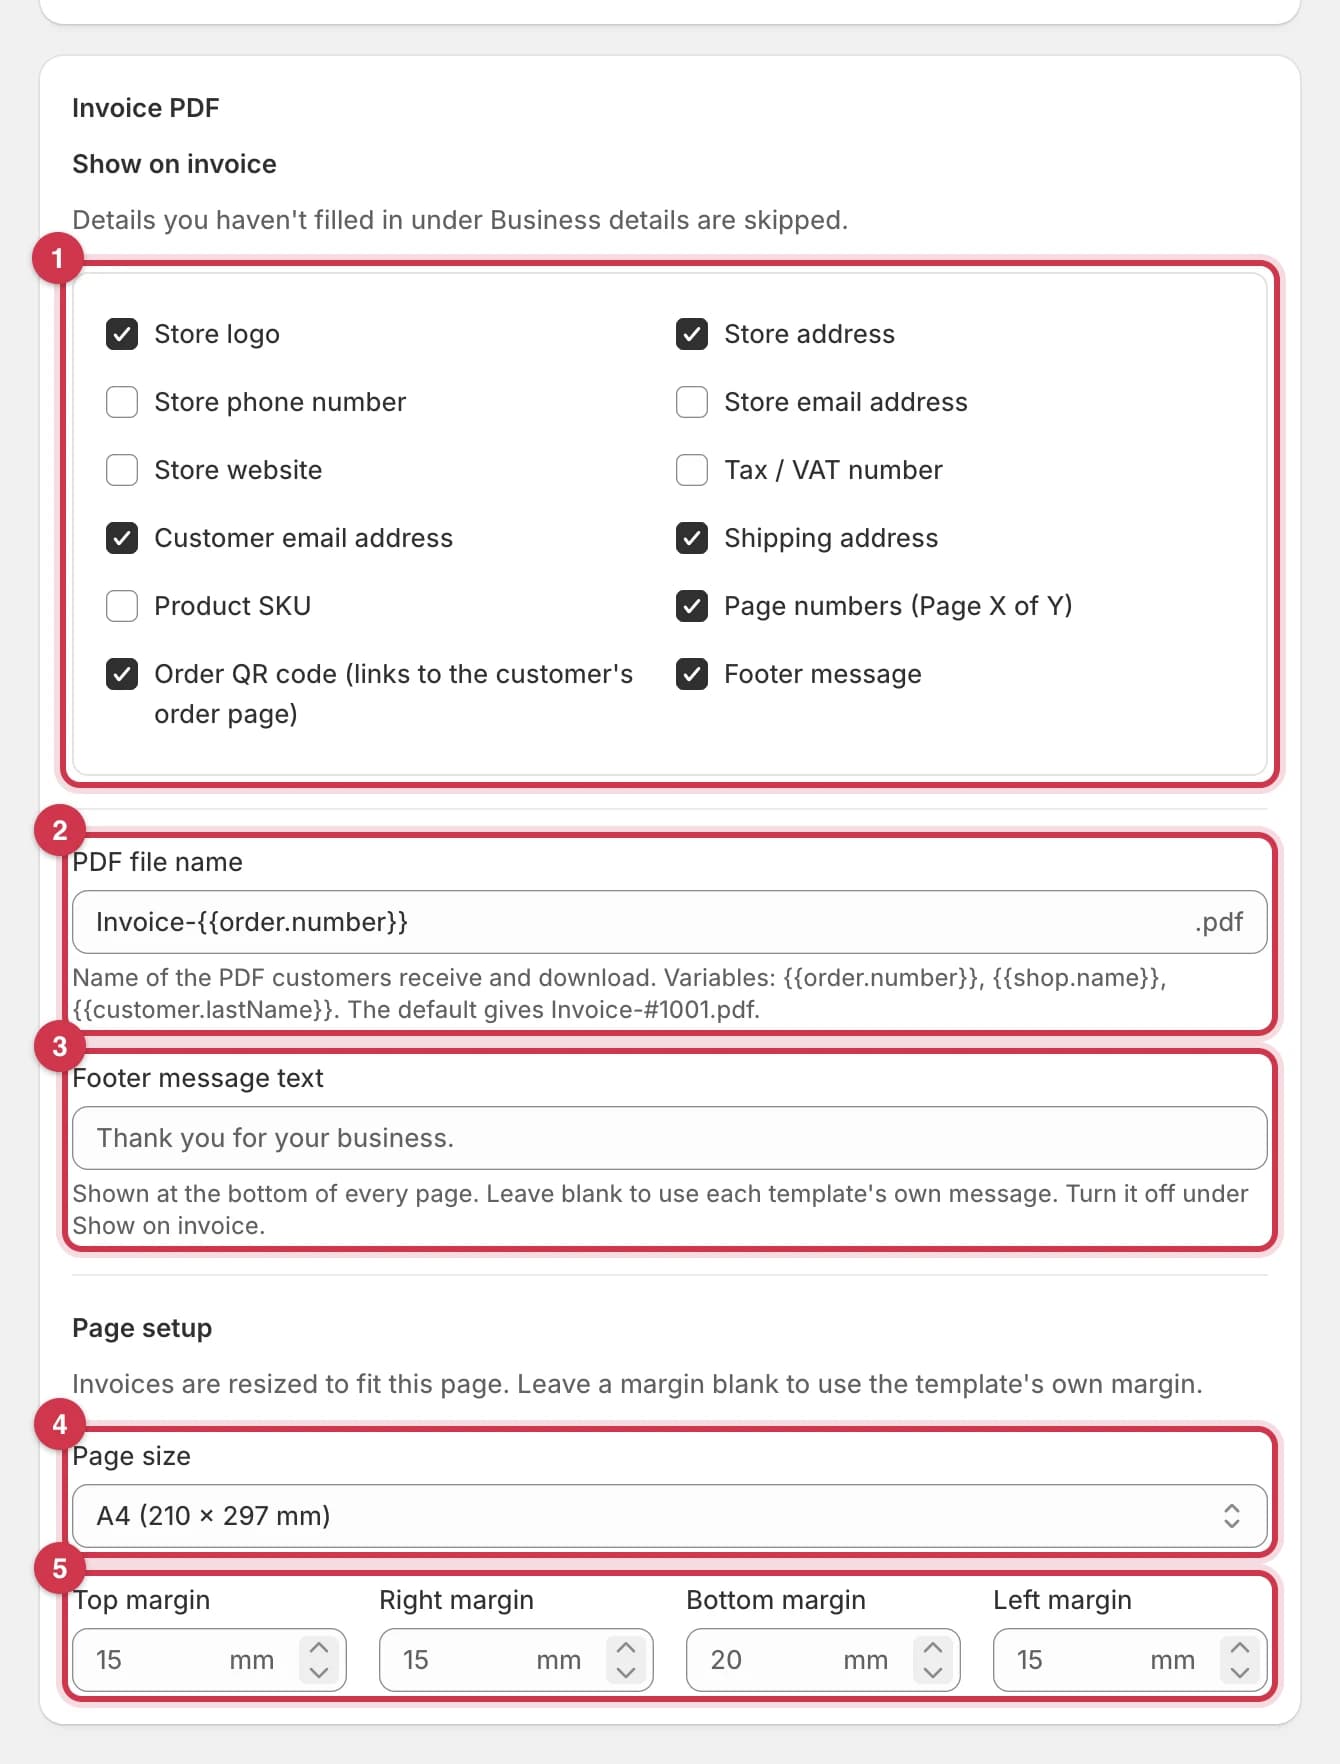
- Show on invoice: 12 checkboxes that choose what's printed.
- PDF file name: the name of the PDF file.
- Footer message text: the message at the bottom of every page.
- Page size: the paper size.
- Margins: the space around the edge of the page.
Changes apply to every invoice created, downloaded, printed or resent after you click Save, whichever template it uses.
Show on invoice
Tick a box to print that detail on the invoice. Untick it to hide it. Then click Save.
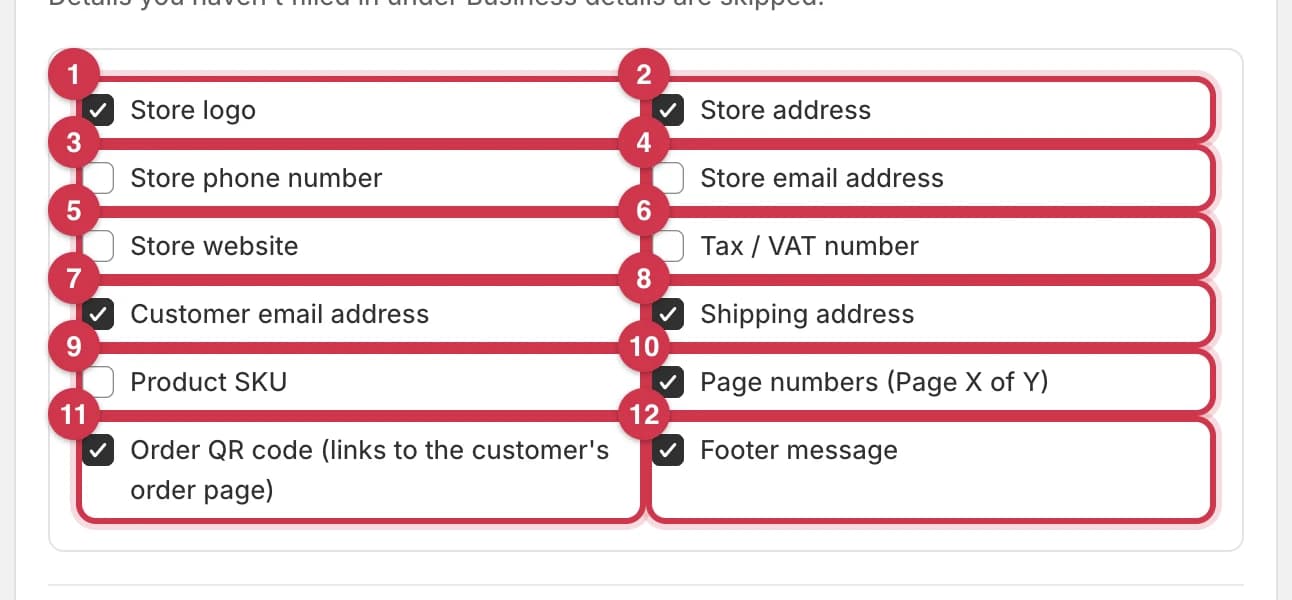
Every checkbox at a glance
| # | Checkbox | What it shows | Ticked by default? |
|---|---|---|---|
| 1 | Store logo | Your logo at the top of the invoice. Without a logo, your company name is shown there in large text. | Yes |
| 2 | Store address | Your store address under your company name. | Yes |
| 3 | Store phone number | Your Company phone. | No |
| 4 | Store email address | Your Company email, or your Shopify store email. | No |
| 5 | Store website | Your Website. | No |
| 6 | Tax / VAT number | Your Tax / VAT number, printed as Tax ID: followed by the number. | No |
| 7 | Customer email address | The customer's email in the billing and customer details. | Yes |
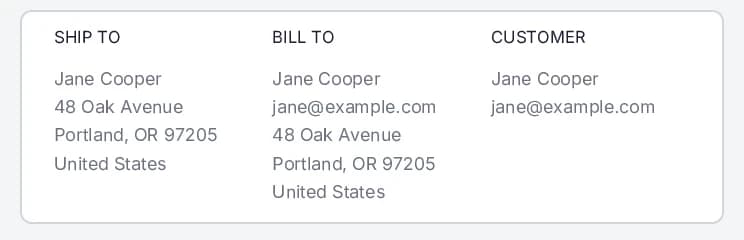
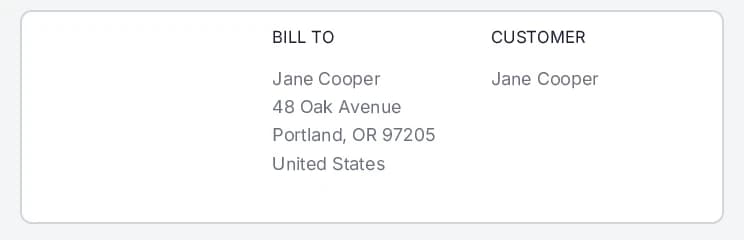
| 8 | Shipping address | The Ship to address. When unticked, the shipping block is left out. | Yes |
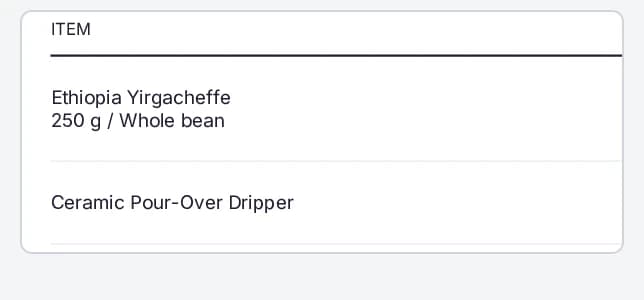
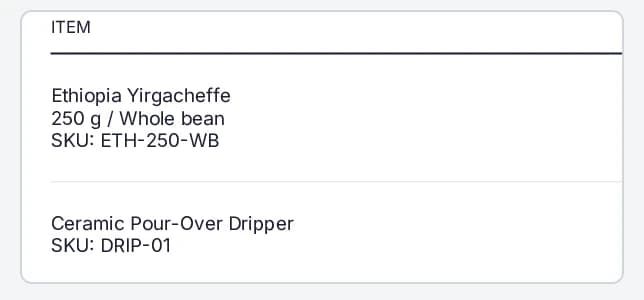
| 9 | Product SKU | Each product's SKU under its name, as SKU: followed by the code. | No |
| 10 | Page numbers (Page X of Y) | The page number at the bottom of every page, for example Page 1 of 1. | Yes |
| 11 | Order QR code (links to the customer's order page) | A QR code your customer can scan to open their order status page. See the note below. | Yes |
| 12 | Footer message | The message at the bottom of every page. See Footer message text. | Yes |
The logo, phone, email, website and tax number come from Business details. If a box is ticked but the detail is empty, that line is skipped.
Before and after
Switch between the tabs to compare an invoice with and without each option.
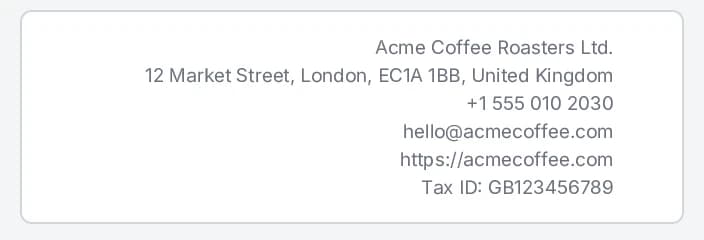
Store contact details (3 to 6). Tick them to add your phone, email, website and tax number under your address.
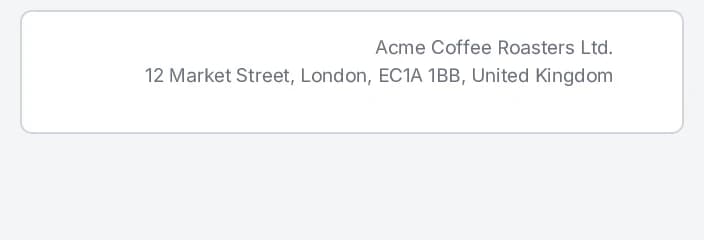
Store logo and Store address (1 and 2). Without the logo, your company name takes its place.


Customer email address and Shipping address (7 and 8). Untick them to leave the email out and remove the Ship to block.
Product SKU (9).
Page numbers and Footer message (10 and 12). The second tab also shows a custom Footer message text.



PDF file name
PDF file name sets the name of the PDF file. It's used for the attachment on invoice emails, PDFs you download from the Invoices page, and the invoice preview.
- In PDF file name, type the name you want. Don't type
.pdf, because it's added for you. - Click Save.
The name can include variables and be up to 120 characters. The hint under the field lists the most useful ones: {{order.number}}, {{shop.name}} and {{customer.lastName}}. See the Variables reference for the full list.
| File name setting | Gives |
|---|---|
Invoice-{{order.number}} (the default) | Invoice-#1001.pdf |
{{shop.name}} invoice {{order.number}} | Acme Coffee Roasters Ltd. invoice #1001.pdf |
Good to know:
- A misspelled variable, or one with no value, is removed from the file name. For example,
Invoice-{{customer.lastName}}becomesInvoice-.pdffor a guest checkout with no name. - Characters that computers don't allow in file names are removed automatically:
\ / : * ? " < > |. - If the name ends up empty, Invoicepak uses the default, for example
Invoice-#1001.pdf. - If you leave the field empty and click Save, you'll see PDF file name cannot be empty.
Footer message text
Footer message text replaces your template's message at the bottom of every page. It's empty by default, so each template uses its own message, such as "Thank you for your business."
- In Footer message text, type your message, for example
Thanks for supporting small-batch coffee! - Click Save.
Good to know:
- Leave it empty to keep each template's own message.
- To hide the footer message completely, untick Footer message under Show on invoice.
- Curly brackets
{ }are removed, so variables don't work in the footer. - The message can be up to 200 characters. If it's longer, you'll see Keep the footer message under 200 characters.
Page setup
Invoicepak resizes your template to fit the page size and margins you choose here, so you don't need a separate template for each paper size.
Page size
- Click Page size and choose a size.
- Click Save.
| Option | Size | Best for |
|---|---|---|
| A4 (210 × 297 mm) | 210 × 297 mm | Most countries. This is the default. |
| US Letter (8.5 × 11 in) | 216 × 279 mm | The United States and Canada |
| Custom size | Any width and height from 50 to 600 mm | Receipt printers, labels or other special paper |
To use a custom size:
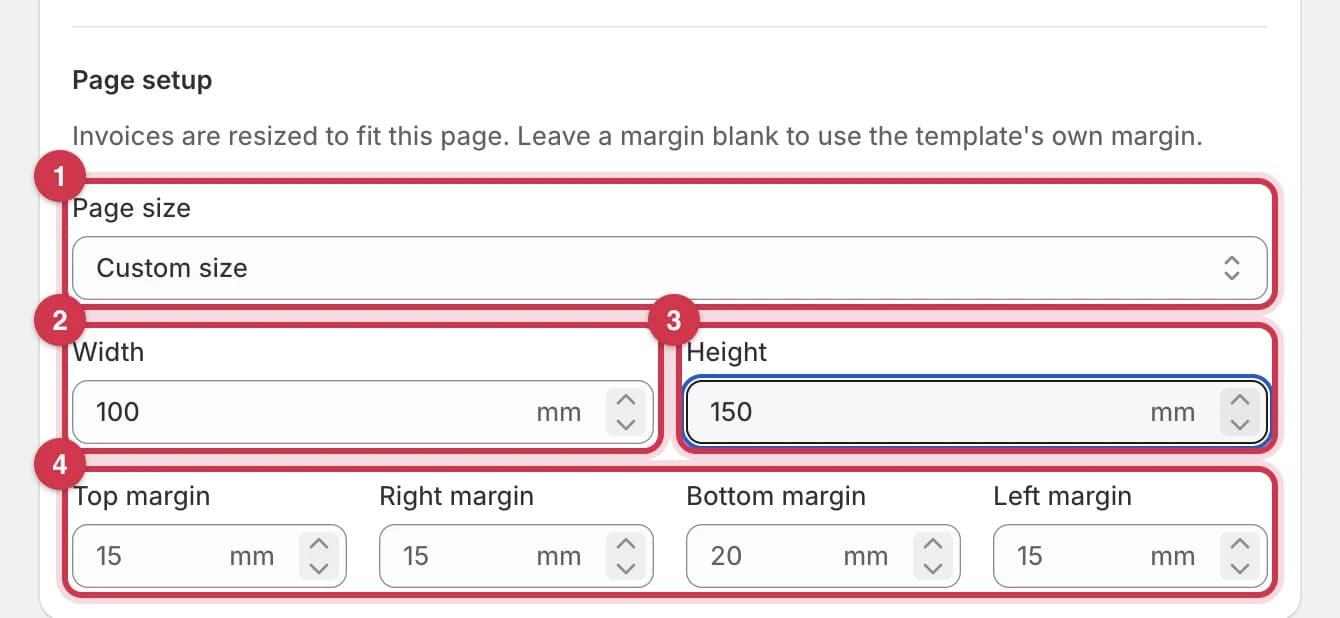
- Choose Custom size from Page size. Two new fields appear.
- In Width, type the page width in millimetres.
- In Height, type the page height in millimetres.
- Adjust the margins if you need to.
- Click Save.
Both Width and Height must be between 50 and 600 mm. If either is empty, you'll see Enter a width and height for the custom page size.
Margins
The four margin fields, Top margin, Right margin, Bottom margin and Left margin, set the empty space between the edge of the page and your invoice. Each takes 0 to 50 mm.
- Type a number, in millimetres, in any margin you want to change.
- Leave a margin empty to keep the template's own margin. The grey number in an empty field shows what your default template uses, for example 15. Each template keeps its own margin when the field is empty.
- Click Save.
If the margins are too big for the page, a red banner at the top of the page says The margins leave no room for the invoice on this page size. There must be at least 20 mm left for the invoice across and down the page. Make the margins smaller or the page bigger, then click Save again.

Save or discard your changes
As soon as you change anything, a bar appears at the top of the page.
- Click Save to keep your changes. You'll see a Settings saved message.
- Click Discard to undo every unsaved change on the page.
The Business details page has screenshots of the save bar.
Which plan do I need?
Everything in this section works on every plan, including Free: the Show on invoice checkboxes, PDF file name, Footer message text, Page size and margins.
Some checkboxes print details that you can only fill in on the Basic plan or higher: the logo, phone, website and tax number. On the Free plan, Store email address prints your Shopify store email.
Common questions
I ticked Store phone number, but it doesn't show on the invoice. Why?
Either Company phone is empty under Business details, or you're on the Free plan. Fill in the phone number on the Basic plan or higher.
Do these settings change invoices I've already sent?
Emails already sent don't change. But when you download, print, preview or resend an invoice, it's created again with your current settings.
Why does my invoice look smaller after I changed the page size or margins?
Invoicepak shrinks the template to fit the space inside the margins. Use smaller margins to make it bigger.
Can I use a different footer message for each template?
Yes. Leave Footer message text empty, then edit the message in each template with the template editor.
Why is my file name missing the customer's name?
The order has no customer name (for example, a guest checkout), so {{customer.lastName}} was removed. Use {{order.number}} if you want every file name to be unique.
Last updated