Template editor
Design your invoice in the Invoicepak template editor. Change text, fonts and colors, add images, QR codes and lines, then preview, test and publish.
The template editor is where you design your invoice: move things around, change text, fonts and colors, and add your own text, images, tables, QR codes, lines and boxes.
Open the editor
- In the Shopify admin sidebar, under Invoicepak, click Templates.
- On the template's card, click Edit, or click the template's picture.
The editor at a glance
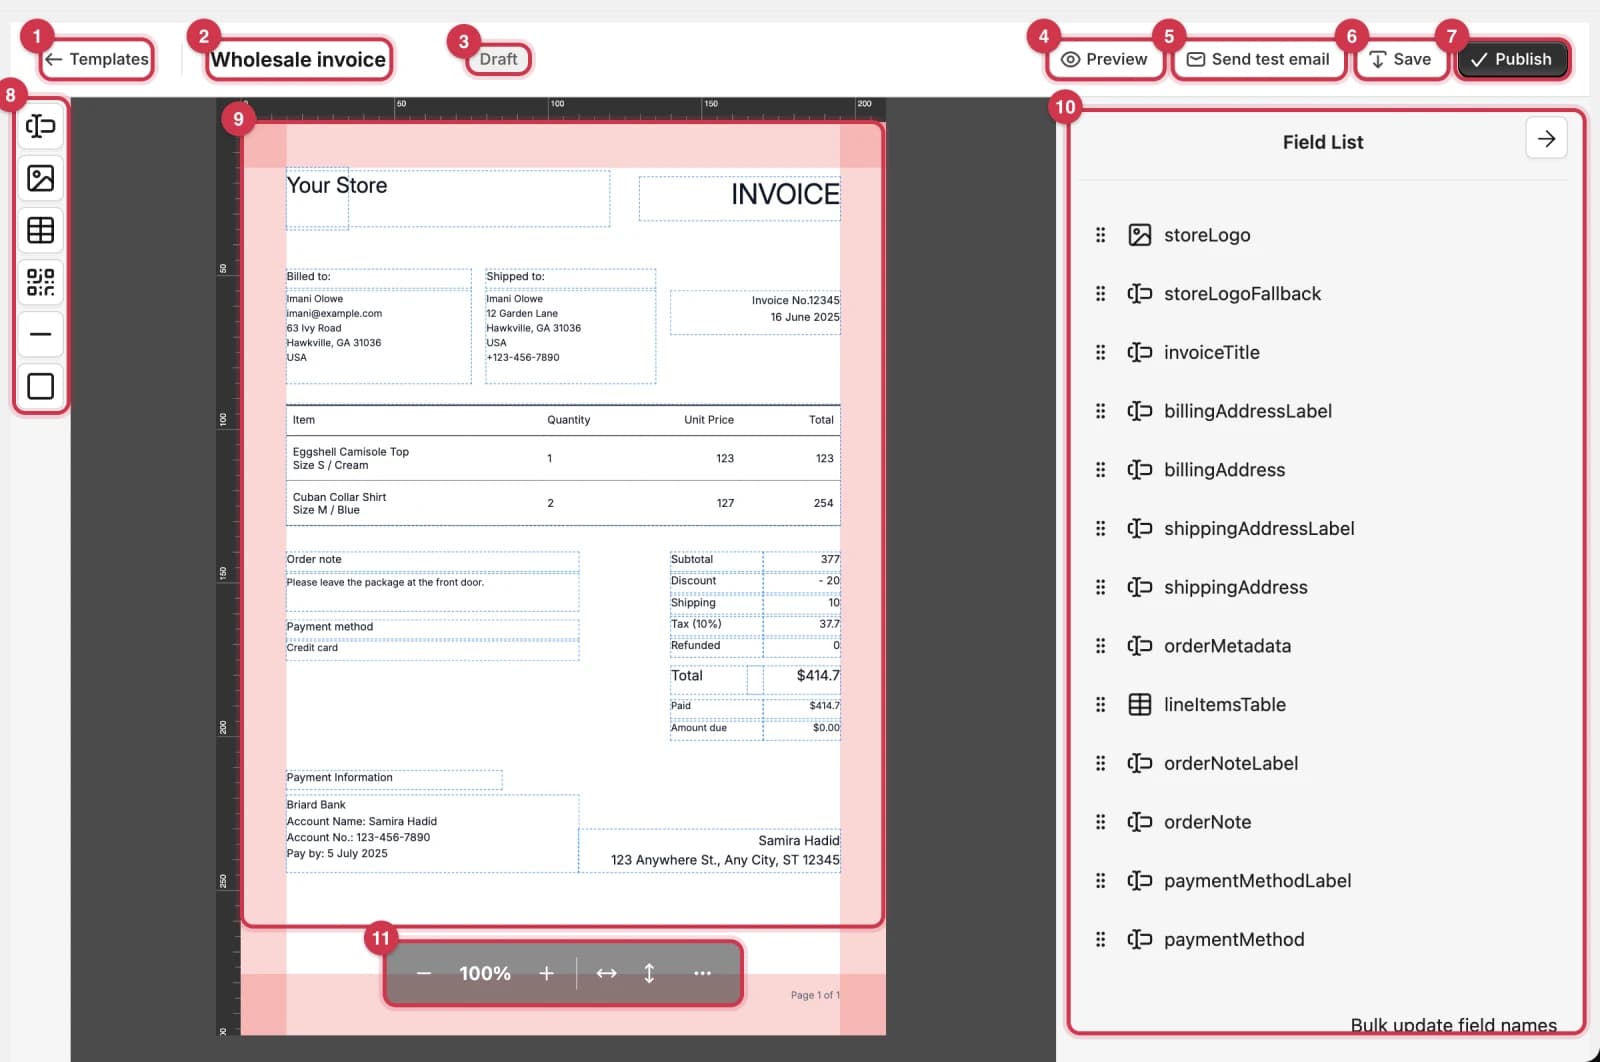
- Templates takes you back to the Templates page.
- The template's name. Click it to rename the template.
- The status badge: Draft or Published.
- Preview shows the template as a PDF. See Preview.
- Send test email emails the template to you. See Send a test email.
- Save saves your changes now.
- Publish makes the template ready to use. On a published template, this button says Move to draft. See Publish or move to draft.
- The element toolbar. Drag these onto the page to add an element.
- The page. The pink areas around the edge are the margins.
- Field List lists every element on the page. When you select an element, this panel changes to Edit Field, which shows that element's settings.
- Zoom controls: − and + zoom out and in, ↔ fits the page to the width, ↕ fits it to the height. … has Add Page After, which adds a blank page. Most invoices only need one page.
How your changes are saved
The editor saves automatically about a second after each change. The status next to Preview shows:
| Status | Meaning |
|---|---|
| Saving… | Your change is being saved |
| Saved | All changes are saved |
| Unable to save changes | Something went wrong. Check your connection and click Save |
| (nothing) | No changes since the editor opened |
You can also click Save at any time.
Change text
- Double-click the text on the page. The text becomes editable.
- Type your new text. Press Enter to start a new line.
- Click anywhere outside the text to finish. The change is saved automatically.
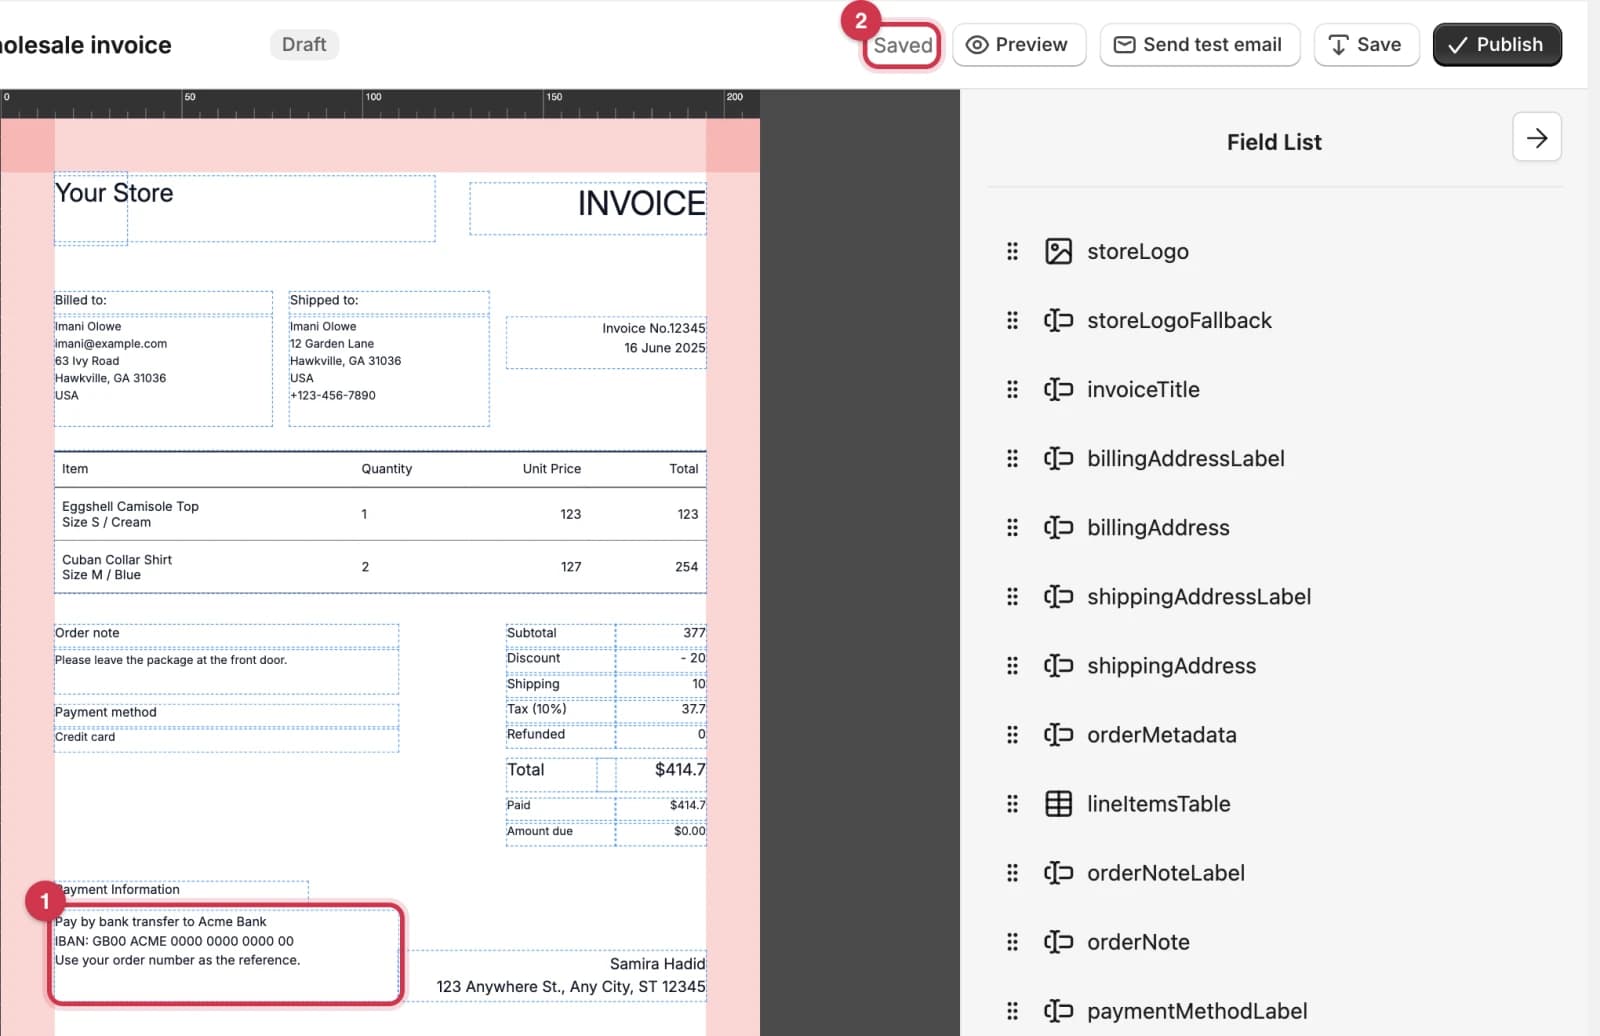
- The edited text.
- Saved shows your change has been saved.
Use this for labels such as "Billed to:", "Order note" or "INVOICE", and for your own text, such as payment instructions or a returns policy.
Text in elements that are filled with order details, such as the customer's address, is replaced on every invoice, so editing it has no effect.
Replace the sample payment details in Minimal
The Minimal template has a Payment Information block with sample bank details ("Briard Bank, Account Name: Samira Hadid…"). This text prints on your real invoices, so change it before you start sending:
- Open Minimal in the editor.
- Double-click the text under Payment Information.
- Replace it with your own payment details, as in the screenshot above. Or, if you don't need it, delete the block and its Payment Information label. See Delete an element and undo.
Select, move and resize an element
- Click an element on the page to select it. Blue handles appear around it, and the right-hand panel shows its settings.
- Move it: drag the element to a new place.
- Resize it: drag one of the blue handles on its edges or corners.
- Rotate it: drag the round handle above it.
For exact positions, type numbers in the Edit Field panel instead:
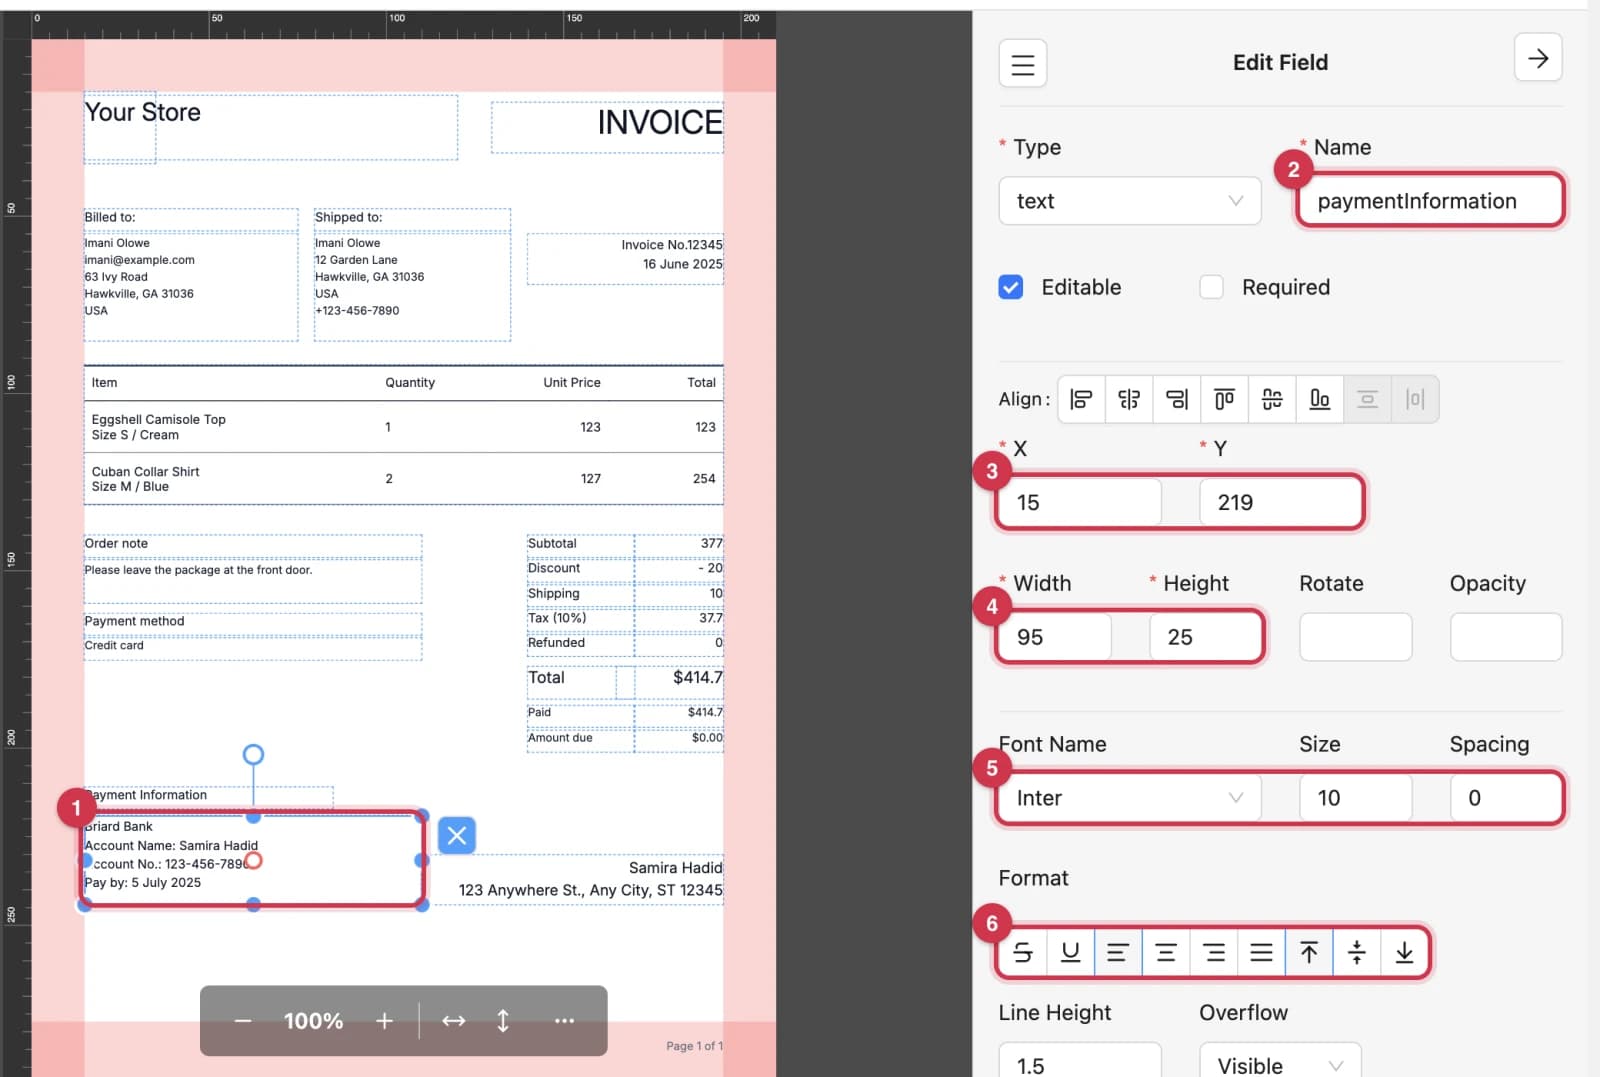
- The selected element, with its handles. The blue × next to it deletes it.
- Name: the element's name. See Elements filled with order details before changing it.
- X and Y: the position from the top-left corner of the page, in millimetres.
- Width and Height, in millimetres.
- Font Name, Size and Spacing: the font, the font size, and the space between letters.
- Format: strikethrough, underline, left / center / right / justified alignment, and top / middle / bottom alignment.
Fonts, colors and other settings
The Edit Field panel shows different settings for each kind of element. For text, scroll down the panel to see them all.
| Setting | What it does |
|---|---|
| Align | Lines up the element with the edges or center of the page |
| X, Y | Position from the top-left corner, in mm |
| Width, Height | Size, in mm |
| Rotate | Angle, in degrees |
| Opacity | 0 (invisible) to 1 (solid) |
| Font Name | Inter, Roboto, Open Sans, Lato, Montserrat, Poppins, Nunito Sans, Source Sans 3, Work Sans, Raleway, Rubik, Playfair Display, Bitter, Lora, PT Serif or Oswald |
| Size | Font size |
| Spacing | Space between letters |
| Format | Strikethrough, underline, horizontal and vertical alignment |
| Line Height | Space between lines |
| Overflow | What happens when text is too long for the box |
| Dynamic Font Size | Shrinks the text to fit the box |
| Text Color, Background Color, Border Color | Colors. Type a hex code like #1F2933 or pick one |
| Border Width | Border thickness on each side |
| Padding | Space inside the box on each side |
Add an element
The element toolbar on the left has six kinds of element:
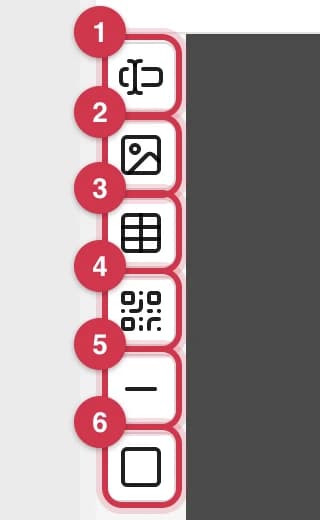
| # | Element | Use it for |
|---|---|---|
| 1 | Text | Your own text, such as a returns policy or bank details |
| 2 | Image | A picture, such as a signature or certification badge |
| 3 | Table | A table of your own |
| 4 | QR code | A QR code. New QR codes link to the customer's order page. See below |
| 5 | Line | A divider line |
| 6 | Rectangle | A box or colored background |
To add one, drag the element from the toolbar and drop it on the page. The new element is selected, so you can move it, resize it and change its settings straight away.
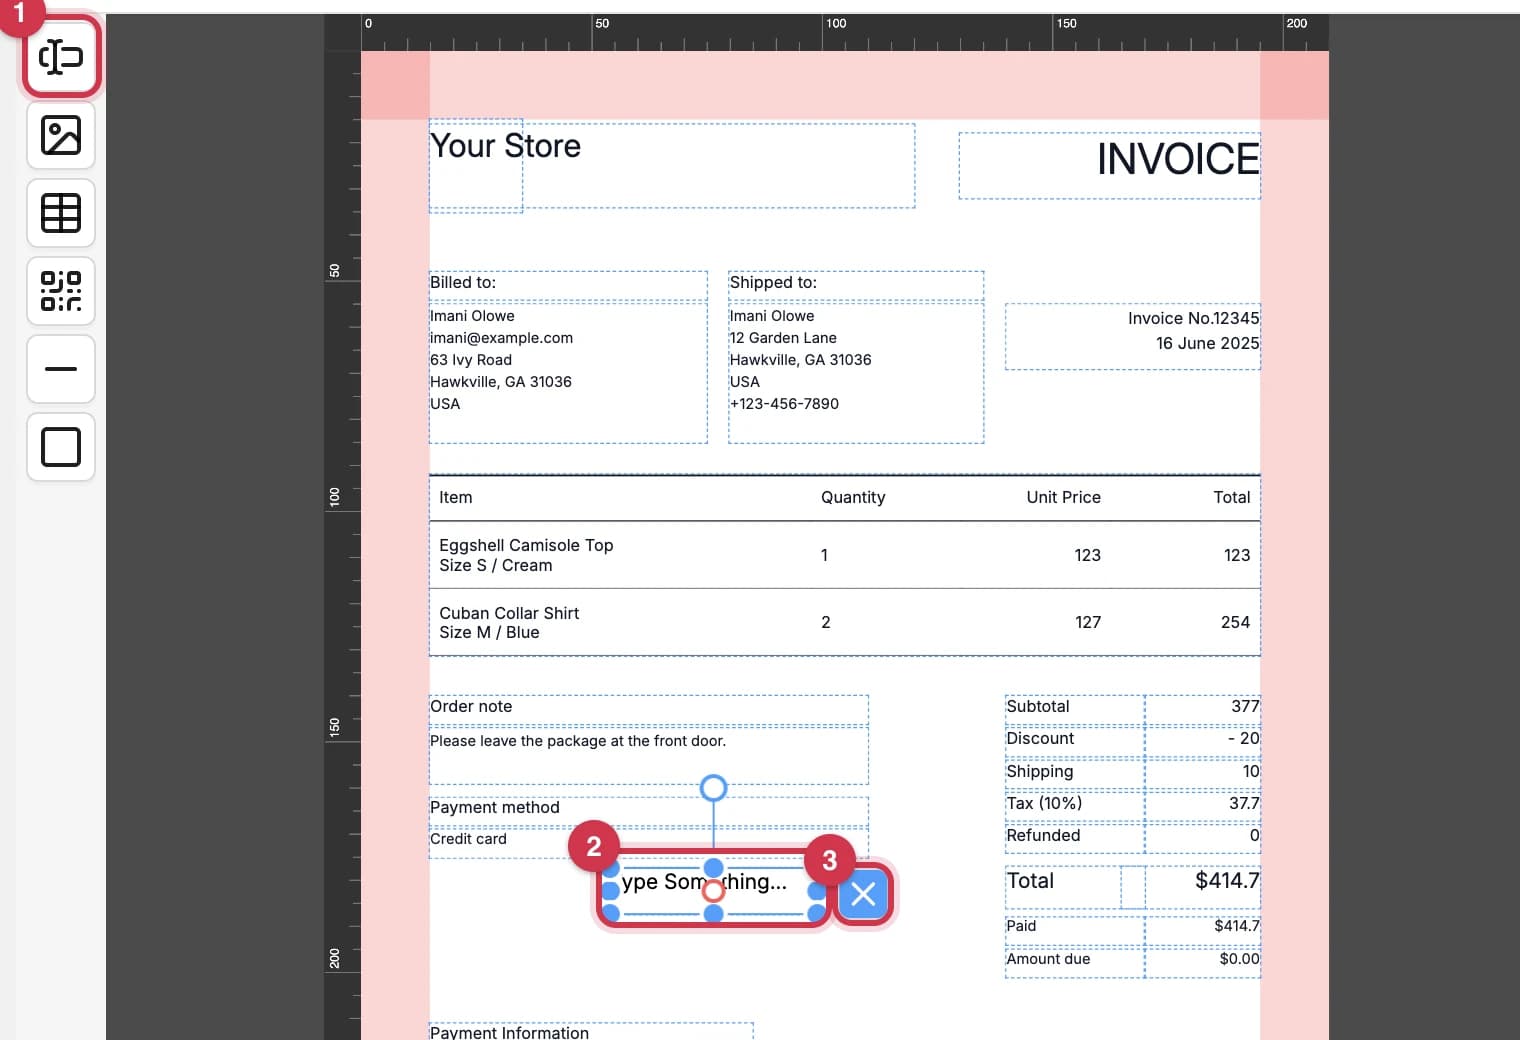
- The Text tool.
- The new text element. Double-click it to replace "Type Something…" with your text.
- The blue × deletes it.
Add a QR code that links to the order
A QR code lets your customer scan the invoice to open their order status page.
- Drag the QR code tool onto the page.
- Move and resize it. A size of about 25 × 25 mm scans well.
- Make sure Order QR code is ticked under Show on invoice in Settings. It's ticked by default.
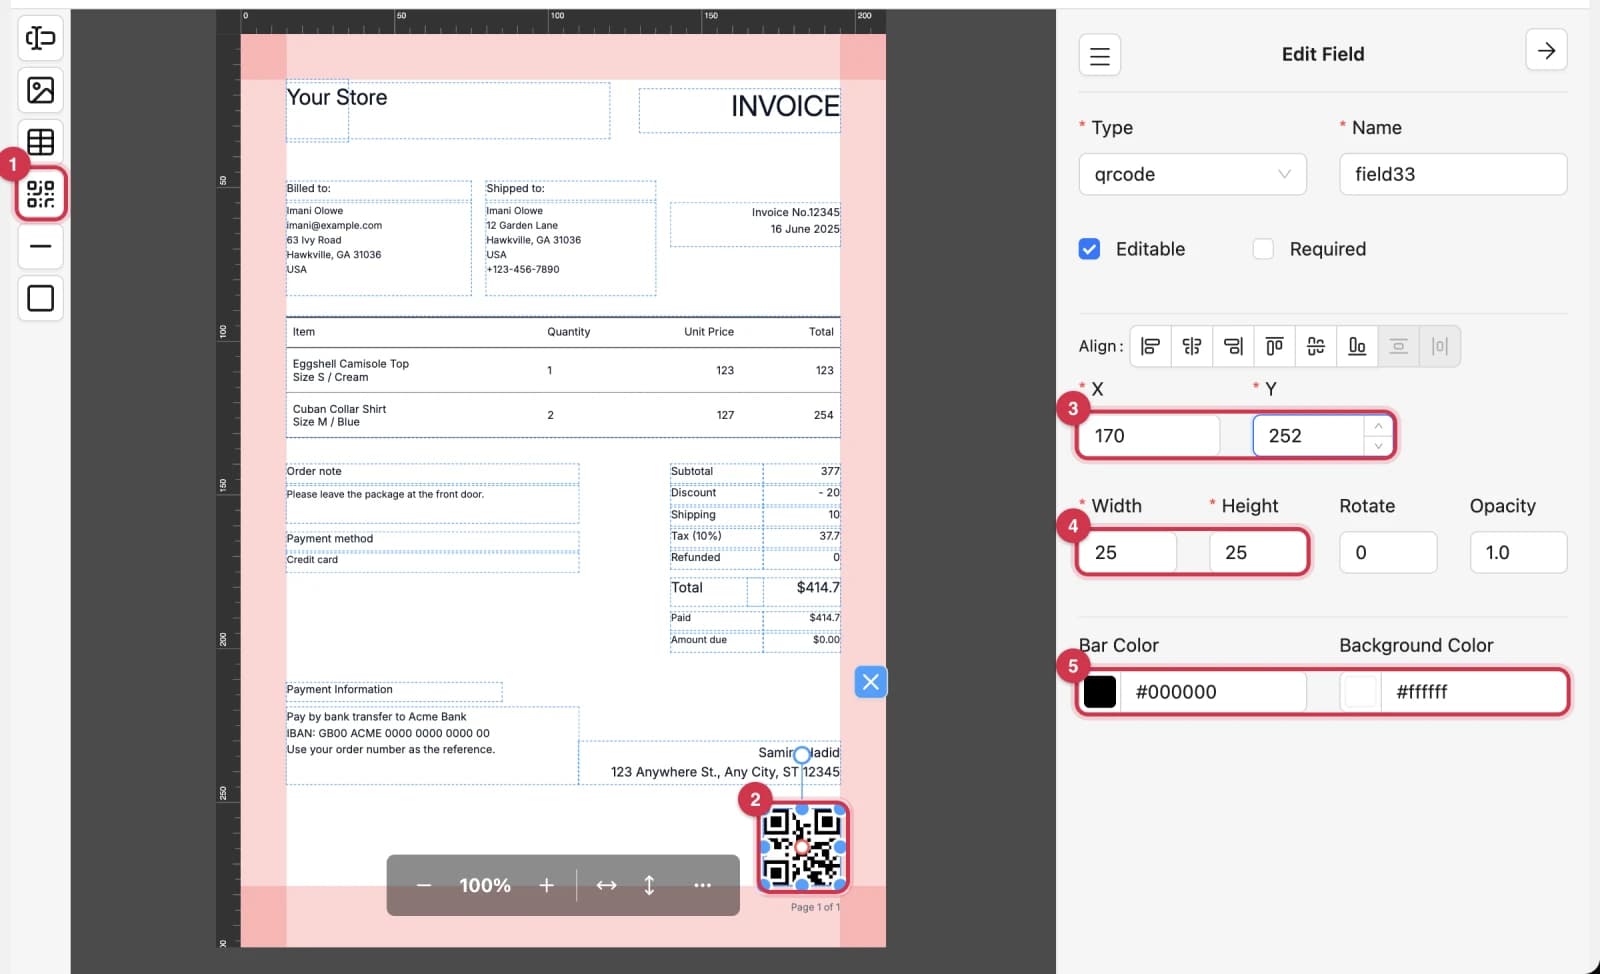
- The QR code tool.
- The QR code on the page.
- X and Y set its position.
- Width and Height set its size.
- Bar Color and Background Color set its colors. Keep good contrast so it scans.
On real invoices, the QR code links to that order's status page. If an order has no status page, the QR code is left out.
Delete an element and undo
To delete an element, click it to select it, then click the blue × next to it, or press Delete or Backspace on your keyboard.
To undo, press Ctrl + Z (or Cmd + Z on a Mac). Press it again to undo more.
Elements filled with order details
Each element has a Name, shown in the Field List. Invoicepak fills elements with these names with the order's details on every invoice:
| Name | Filled with |
|---|---|
storeLogo | Your Logo URL from Business details (unless you've put an image in it yourself) |
storeLogoFallback, storeNameWithLogo, storeName | Your company name |
storeAddress | Your store address, plus the phone, email, website and tax number you've ticked under Show on invoice |
customerInfo, customerDetails | The customer's name, email and phone |
billingAddress, shippingAddress | The billing and shipping addresses |
orderMetadata | "Invoice No." with the order number, and the order date |
orderNumber, orderDate | The order number and the order date, separately |
lineItemsTable | The products, quantities and prices |
subtotal, discount, shipping, taxLabel, tax, total | The order totals |
paid, refunded, amountDue | Payment amounts |
paymentMethod, shippingMethod, orderNote | The payment method, shipping method and the customer's order note |
thankYou | Your Footer message text, if you've set one |
Everything else, such as labels and your own text, prints exactly as you typed it. Your own elements can have any name; each new element gets a name like field33.
Rename the template

- Click the template's name at the top.
- Type the new name.
- Press Enter, or click anywhere else. Press Esc to cancel.
Two templates can't have the same name. If the name is taken, you'll see an error and the old name comes back. An empty name isn't saved.
Preview
Click Preview at the top. The template opens as a PDF filled with a sample order, with your Invoice PDF settings applied. Click Close to go back. The Create and manage page has a screenshot.
Send a test email
Send yourself the invoice email with this template, to check how it looks in a real inbox.
- Click Send test email at the top.
- In Send to, type your email address.
- Click Send test email. Or click Cancel to close the window.
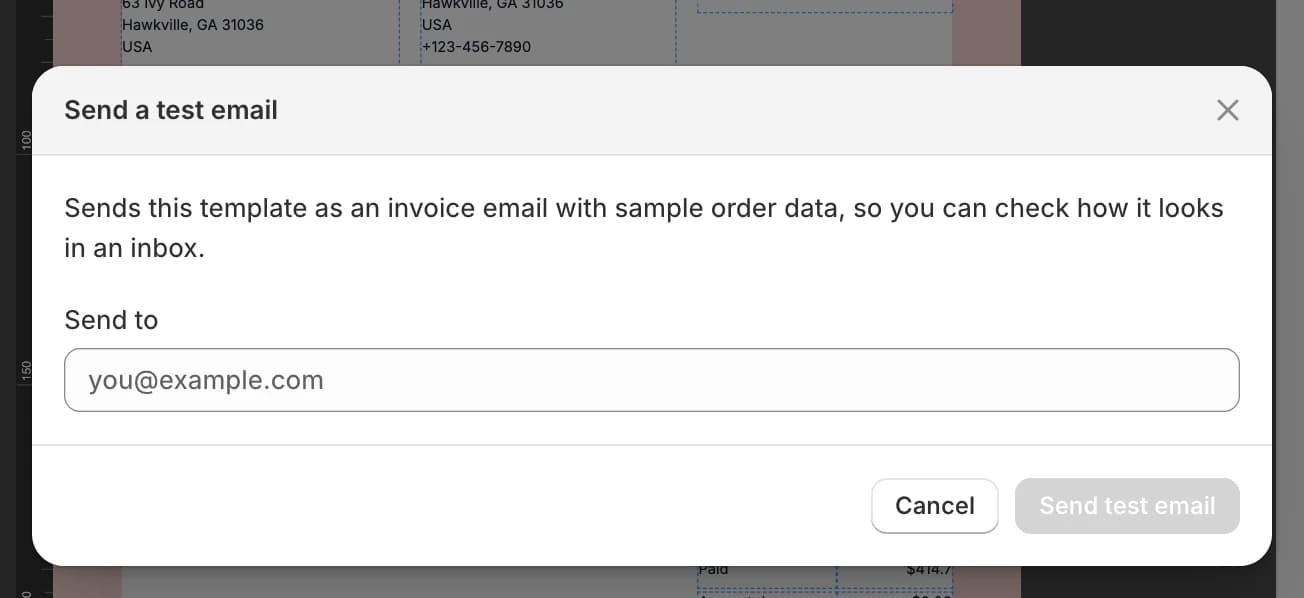
You'll see Test email sent to your address. The email uses a sample order, the default subject and message, and your Invoice PDF settings, and always attaches the PDF. Your custom Subject, Message body and PDF file name from Settings aren't used in test emails.
Good to know:
- Test emails don't count towards your plan's monthly invoice limit.
- You can send up to 100 test emails a month on every plan. After that you'll see a message saying when you can send more.
- The test email uses the last saved version of the template.
Publish or move to draft
To publish a draft template so it's ready to use:
- Wait until the status says Saved. Publish is greyed out while changes are being saved.
- Click Publish.
The badge changes to Published, and the button changes to Move to draft.
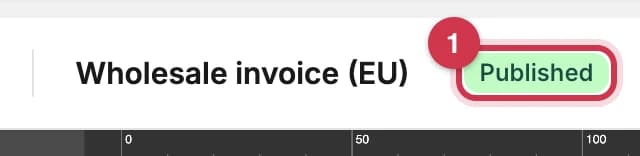

- The Published badge.
- Move to draft.
Publishing doesn't make the template your default. To use it for your invoices, set it as default on the Templates page.
To move a published template back to draft:
- Click Move to draft.
- Your browser asks: "Move this template back to draft? It won't be usable as the shop's default template until it's published again." Click OK.
You can't move your default template to draft. The status then shows Set another template as default before unpublishing this one.
Which plan do I need?
The editor works on every plan, and every plan can send 100 test emails a month. What differs is how many templates you can have.
Your logo fills the storeLogo element on the Basic plan or higher. On the Free plan you can still add your own logo with an Image element.
Common questions
I edited my default template. When do invoices change?
As soon as the status says Saved. Published templates don't have a separate draft.
Why does the editor show "Imani Olowe" and the preview "John Smith"?
Both are sample content. Real invoices use the order's details.
My invoice shows sample text instead of the customer's address. Why?
The element's Name was probably changed. Check it against the table in Elements filled with order details.
Can I use {{order.number}} in the template?
No. Variables work only in the email subject, message and PDF file name. To show order details on the PDF, use the elements filled with order details.
Why is Publish greyed out?
Your latest change is still being saved. Wait for Saved.
How do I get a starter design back after changing it a lot?
Click Create template on the Templates page and choose Use design under that design. See Create a template.
Last updated